Cook's 80g Seapora Frag tank

Cook

President
Staff member
Supporting
Messages
1,307
Reaction score
1,571
Location
Roswell
Let's get this part out of the way, @scottw, I can see how one can go through a few tanks in a short time span now. The impetus for me is that the maintenance and testing of three coral tanks is a lot. Also, my son is really missing raising clownfish so I need to consolidate to enable room for that. The rotifers are going again already in preparation.

All my other tanks have been used purchases, this system is new due to the fact that I didn't realize when several of these tanks (Deep Blue before they were Seapora) were going cheap on the forums how much better the footprint is for frag grow out and organization. These tanks are not easy to find and are more expensive now due to shortages. The Seapora tank and stand took about a month to come in, but it was still much cheaper than going custom.

Here's some more why's: My breeder clowns take up one whole rack in the 40g and the rack has to be empty or they will throw the frags on it overboard. They are strong little fish when they want to be. I need more space, I think we've already established I'm a coral hoarder. In addition, I did see some benefits in the 20 gallon Waterbox tank, but right after I set that tank up to enable higher nutrients for zoas, my 40 gallon nutrient levels finally spiked defeating the purpose. All my equipment for the 40gallon breeder was also oversized with the idea that I could upgrade the tank at a later date, so here we are. All in all I have no regrets with the 40 breeder system, it cannot be beat for the price when it comes to a good cheap frag tank.

I've also decided to participate in 1-2 coral shows a year in addition to whatever we do as a club. You'll see my son Brady and I selling as Cook's 3D Reef at one of those events if we happen to cross paths.

This thread will take over where these other two threads leave off if anyone is interested:


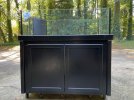
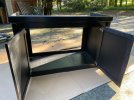
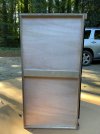
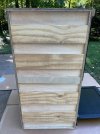
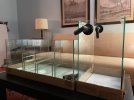
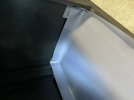
Jason @ Premier Aquatics tracked the tank and stand down for me which wasn't easy as I mentioned so thanks to him. The stand is an R&J enterprises Modern Birch stand made made for a rimmed tank, it fits the Seapora perfectly and hides the bottom rim. I did modify the bottom bracing for the sump area, that wasn't what this stand was built for in my opinion, it's 1/4" plywood routed into the 3/4" plywood with only a center brace. I also needed to cut out the top 1/4" plywood under the overflow area for bulkhead access.
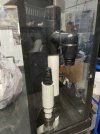
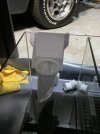
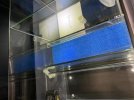
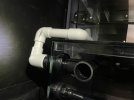
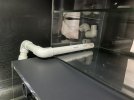
IMG_0354.jpgIMG_0347.jpgIMG_0345.jpgIMG_0348.jpg
 
I got the sump for this tank from @hzheng33, which was something he had made for another project. It wasn't exactly what I was looking for, but I think it will actually turn out better overall than what my idea of a good sump was and the price was great. It has enough space in the areas where I need it, but does not have an area for a refugium. I thought about eliminating a refugium entirely, but I have all the rubble, chaeto, rock, lights, and an inhabitant, a big claw pistol shrimp, for one already. I decided to double down on it and plan on an addon refugium that adds about 11 gallons to the system. I found the Refugium from Aquarium Life Support Systems, branded as Aqualife. They were great to deal with and it was shipped literally encased in spray foam, so short of a FedEx truck running over it, the tank was going to arrive at my doorstep unbroken. I think it matches up almost perfectly to the custom sump, though I will have to work out the plumbing details since the way the refugium is drilled I can't let the output return straight down back into the sump and I may need to elevate it a few more inches.
IMG_0344.jpg
 
Isn’t that the bottom of the stand? Spraying it helps but isn’t it overkill?


Sent from my iPhone using Tapatalk
 
Nice!

You going to spray something on that bare wood 🪵 to protect it?
It's a fair point, I'm going to install shower floor pan liner in the sump area to keep the wood from getting wet in the first place. I did the same for my display system when I did that one.
 
Let's get this part out of the way, @scottw, I can see how one can go through a few tanks in a short time span now. The impetus for me is that the maintenance and testing of three coral tanks is a lot. Also, my son is really missing raising clownfish so I need to consolidate to enable room for that. The rotifers are going again already in preparation.

All my other tanks have been used purchases, this system is new due to the fact that I didn't realize when several of these tanks (Deep Blue before they were Seapora) were going cheap on the forums how much better the footprint is for frag grow out and organization. These tanks are not easy to find and are more expensive now due to shortages. The Seapora tank and stand took about a month to come in, but it was still much cheaper than going custom.

Here's some more why's: My breeder clowns take up one whole rack in the 40g and the rack has to be empty or they will throw the frags on it overboard. They are strong little fish when they want to be. I need more space, I think we've already established I'm a coral hoarder. In addition, I did see some benefits in the 20 gallon Waterbox tank, but right after I set that tank up to enable higher nutrients for zoas, my 40 gallon nutrient levels finally spiked defeating the purpose. All my equipment for the 40gallon breeder was also oversized with the idea that I could upgrade the tank at a later date, so here we are. All in all I have no regrets with the 40 breeder system, it cannot be beat for the price when it comes to a good cheap frag tank.

I've also decided to participate in 1-2 coral shows a year in addition to whatever we do as a club. You'll see my son Brady and I selling as Cook's 3D Reef at one of those events if we happen to cross paths.

This thread will take over where these other two threads leave off if anyone is interested:


Tank looks beautiful, I think these 80's are just amazing. It is WAY too easy to go through tanks, that is why this next one will be so big my wife will murder me if I try and sell it haha... I think that is the only way I can commit... I can't wait to see this tank full! I want to come look when you have it ready for sure!!

I love the sump too, looks so clean!
 
I’m aiming to go for the tank swap on Sunday. Waiting on parts though, I need a new gate valve. I got the shower pan liner installed last night in preparation for placing the sump once the foam leveling pad arrives so that the plumbing can be completed.
E91B151D-05FE-46C7-BD64-91757D4E43C2.jpeg
 
1" would be my preference. I could make do with 3/4" also.
 
I have a bunch too if you can't find any hit me up, I have 2 tubs full of crap.
 
Thanks everyone for the gate valve offers. I did a 15 hour work day today, so I didn’t have time to follow up on them. I ordered a Spears valve from Premium Aquatics that should arrive Friday. If issues I’ll definitely reach out.
 
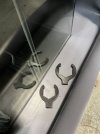
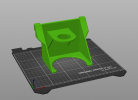
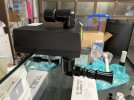
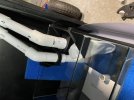
Swapping out the tanks by this weekend was completely unrealistic given everything else we had going on (band plus a car show) and, as always with these projects, the usual plumbing issues while working out the lines. ;) It seems I never have enough plumbing parts. I did get the bulkheads installed and I did a quick leak test to see that they were tight enough. I printed some bulk head hand wrenches which helped. I also modified a filter sock holder I found online to accept the main drain line so that it is secured from the drain to the sump and of course I didn't think of that until I got the first one printed. Each print takes 14 hours, so I'm waiting for version 2 to finish this morning. I'm going to set a new date for moving the tank to the end of the month as I have a week of PTO scheduled then already and I have a lot of other stuff to move around to allow for holding containers for the fish and corals. Below is a picture of version one. As you can tell, the tank is coming together in the garage.
E8C8E482-1A54-41E0-941D-079F9BC36CFF.jpeg17CA40DB-A78D-4D0E-9539-A441707F0F9D.jpeg0324E906-AEE6-43B3-A8E6-8A12A4694C00.jpeg
1633352736000.png
 
Last edited:
This is a great question. Yes, the original return line is now a full siphon drain with the 1” drain becoming an emergency drain. I like the idea of equipment redundancy. I’m using two Sea Swirls for the returns (Marine Depot clearance for $95 each instead of $250 each). I have added VCA random flow nozzles also. Now these units are big and I am thinking the second one may be too much. Just one can handle up to 800gph flow To stick with the redundancy theme, between the two of them I don’t want to flow more than 1000gph, so that’s what I will try when I leak test the system and see how it goes. They are going to be a pain to design a screen cover around also.
4804404F-4171-40C0-868D-AA5EB11F61CC.jpeg
 
This is a great question. Yes, the original return line is now a full siphon drain with the 1” drain becoming an emergency drain. I like the idea of equipment redundancy. I’m using two Sea Swirls for the returns (Marine Depot clearance for $95 each instead of $250 each). I have added VCA random flow nozzles also. Now these units are big and I am thinking the second one may be too much. Just one can handle up to 800gph flow To stick with the redundancy theme, between the two of them I don’t want to flow more than 1000gph, so that’s what I will try when I leak test the system and see how it goes. They are going to be a pain to design a screen cover around also.
View attachment 48961
Ooooh, random flow generators!
 
I have the drain line plumbing worked out and there was a little back and forth on the filter sock and overflow 3D designs, but they are done and work well.

I prepared some egg crate and cut the filter sponge tonight from 20ppi material, I really wanted 15ppi to have a more porous less easily clogged sponge, but the delivery date was mid December. I’ll probably order the 15 ppi for just in case this one is problematic later.
I also have the drain line ready for glue for the refugium. I’m using a small pump for flow so the 1” drain is overkill.
20A32639-710A-4A02-80CE-EBC8F1583087.jpeg29634086-0FC0-4146-9518-402C0ACFCE50.jpegEF5D3E5B-797E-4EEF-A3D3-C0DB92EE7896.jpeg8EDEF4BF-CB64-47D3-82CA-C5D9C553E2A6.jpeg
 
Do you ever have a reef project that seems to fight you every step of the way? That's this project for me. I finally got all my PVC glued together yesterday and even though I marked everything, the return line was a problem. I was worried it would get too short on me since the PVC always goes together easier once the glue has been applied, but I ended up being a 3/8" too long which doesn't sound like much but it is the difference between two halves of a union sitting flush with one another versus angled, which will leak. I finally got that all worked out this morning and I added a second union above the return pump. In the end, I'd like to say it's better, and it will be for cleaning the pump, but I panicked when I glued the last of the pipe together and assembled it quickly for test fitting while the glue was still not set. It turns out that I didn't have the return pipe in the right position, it was angled more than I had planned for originally, so I cut the pipe to try to fix it before I realized my mistake. Measure twice, cut once, make sure every piece is marked and then trust yourself that you did it right.

I also had to take the bulkheads loose and reconfigure the emergency overflow 3D printed holder. there wasn't enough clearance between the 4" filter sock and the overflow to easily replace the sock. It was OK before and everything was marked, so I don't know what I did differently, but 6 hours of printing later, problem solved. I'm leak testing the overflow section again now and all is well so far.

I've also backed off the idea of using two sea swirls for returns. I'm just going to use one and then keep my two MP10's in the mix. I'll save the second one as a backup. Testing the one sea swirl with this size tank seems to be enough to cover the majority of the tank (90 degrees of movement) without shooting water directly into the overflow. This tank has to support SPS, LPS, and zoas / palys so I want some areas of the tank to have less flow than others. I'm going to pull my 40W UV sterilizer for now and leave it out of the system, the problem with it is that it's a little too oversized to allow for lower maintenance levels of UV treatment unless I routed the return line through the UV also. I didn't want that level of commitment with the older unit I have.

I'm going to apply a black vinyl static cling sticker to the back of the tank next instead of painting it. The goal is still to have the tank in place before the end of the day tomorrow, but still a long way to go including clearing my office out and breaking down the 40 gallon. My clowns are going to be upset because they just laid fresh eggs Thursday afternoon. I'm going to see if I can move them all to a 10 gallon temporarily to save the batch.
 
Back
Top